As our son is getting older and we are having another baby (A girl) in a couple months, we wanted to update his room to allow him more autonomy through better intergrating Montessori. The first step was creating him a wardrobe. We looked online for ones to buy and most will be at least $250 on Etsy. We looked for plans for making one and there weren’t much to go off of either. So we went off the little bit we found and enhanced it. Knowing that eventually our girl would be needing a wardrobe as well and they will be sharing a room for now, we made ours have two places for hanging clothes with the shelves in the middle. We were able to get all our supplies for under $100.
Supplies and Tools:
- 23/32 in x 4 ft x 8 ft sanded plywood (we went with pine)
- 3/4 in x 3/4 in x 36 or 48 in Pine Round Dowel
- Sander if you want it to be more smooth
- 180 grit sandpaper
- Kreg Jig
- 1/4 in screws
- White wax
- Wax brush
- Saw (we used our circular saw to cut the dowel and the 32 in pieces for the shelves and had Home Depot cut the rest)
Optional Supplies:
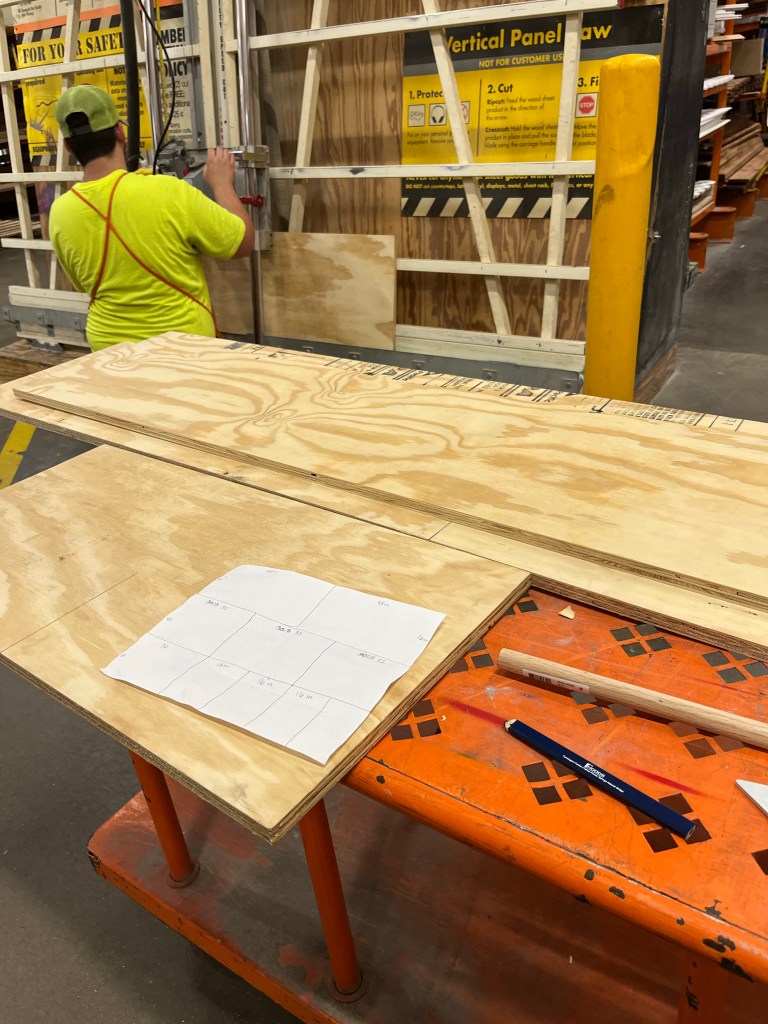
When we bought the board, we brought a piece of paper with our measurements and a pencil so we could mark the measurements on the plywood. This made it alot easier on the guy we asked to cut our board at Home Depot (they cut for free).
Here is what how we measured it out to make the most use of our 4 ft by 8 ft plywood.
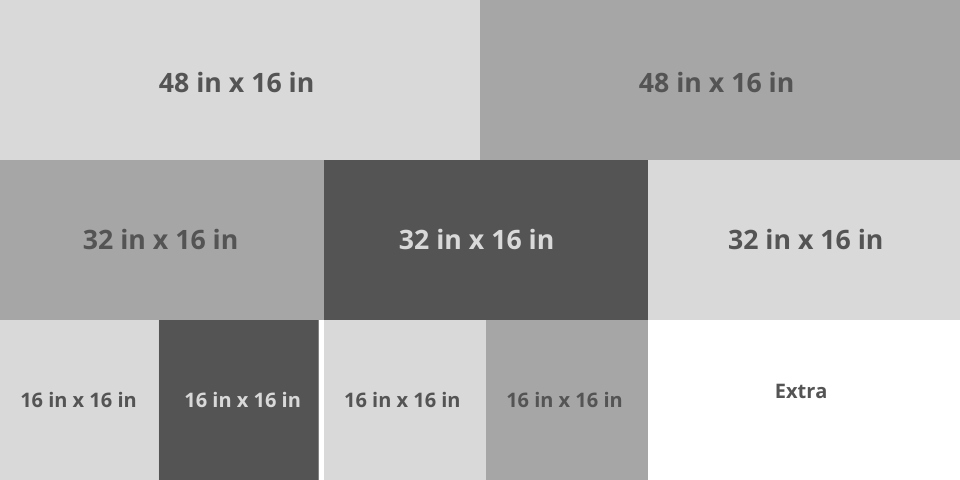
- Two 48 in x 16 in boards (top and bottom)
- Four 32 in x 16 in boards (sides and middle)
- Three 16 in x 16 in boards (shelves) -they couldn’t cut those there, at least our guy couldn’t
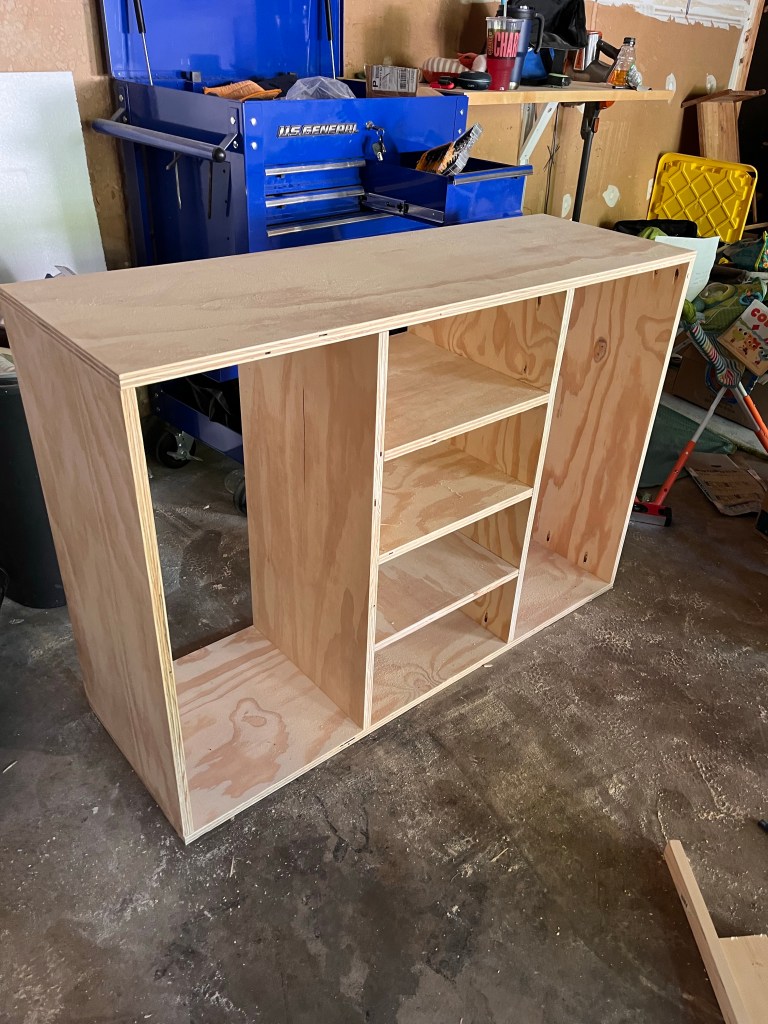
Once we had the pieces cut and brought them home, we sanded them to give a more finished look.
To make it more sturdy, we used Kreg Jig to make pocket holes to attach all the pieces and for the dowel rod we just measured the length between the opening after it was together and secured by screws. One person just used a nail gun to attach everything. It is really up to you and how sturdy you would like it.
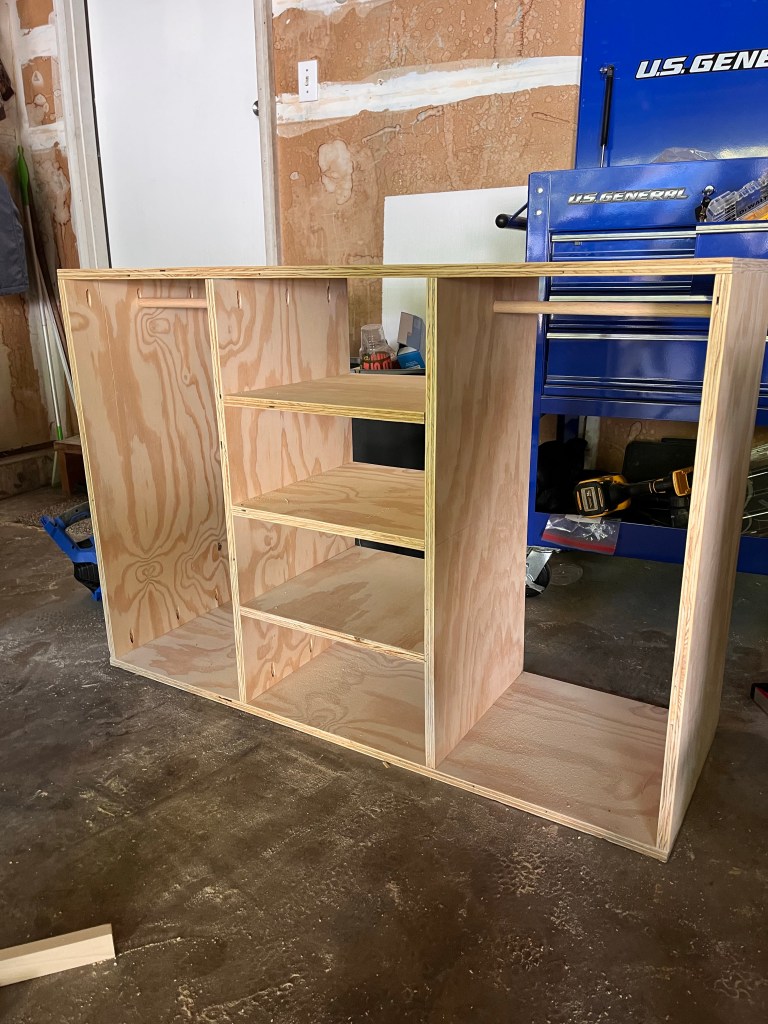
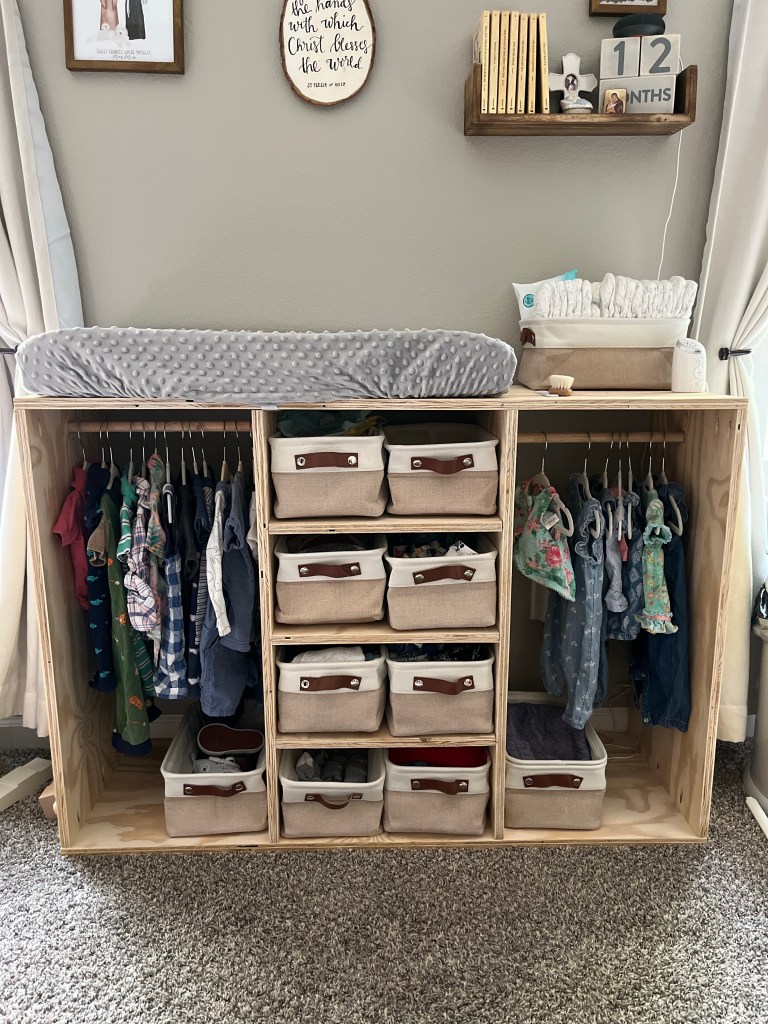
We used white wax to seal/protect the plywood for a natural look and smooth feel. You can definitely paint and stain it. We will be adding beatboard for backing and a 1 in thick trim around the front edges to give it a more finished look.
This was much cheaper to make on our own and it was easy too! Definitely love how accessible it is for our son and excited to see him learn to pick out his own clothes!
